Kale and Quinoa Salad with Mango & Feta

ingredients
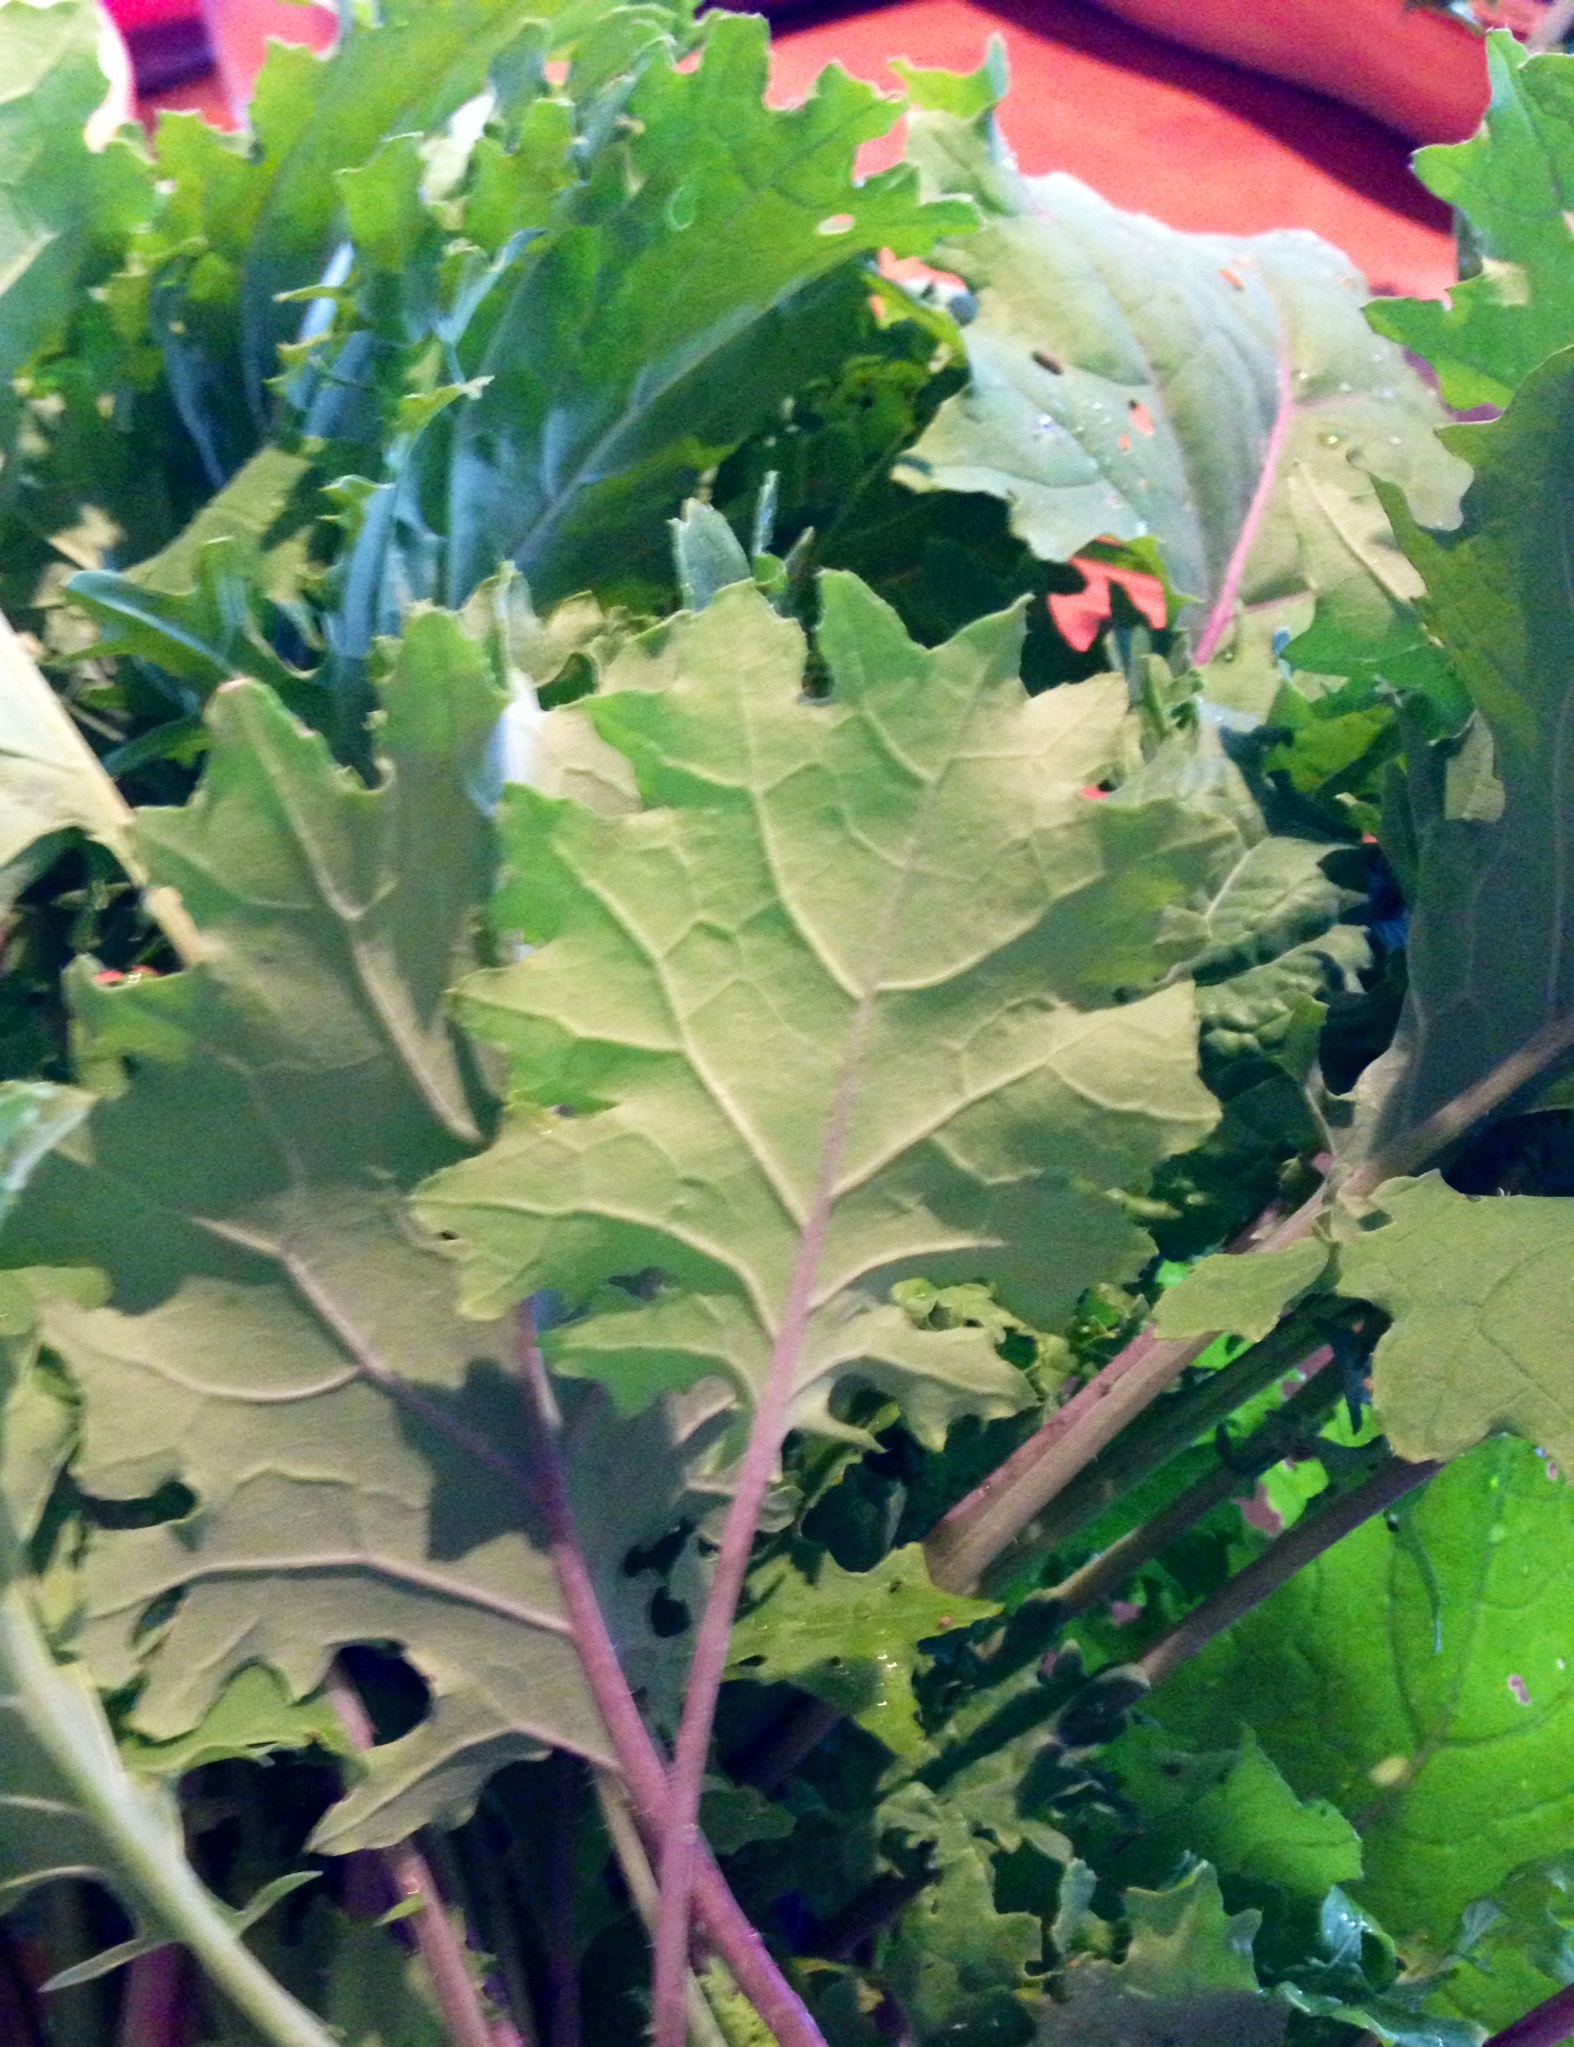
My friend, Geri, brought me the fixins’ for this salad a few months back because she had picked some fresh kale out of her garden that morning. It blew my mind. It’s one of those dishes that each ingredient is independently delicious, but together it’s even better than the sum of its parts. I’ll do my best to be precise, but from what I understand this recipe has evolved like a game of ‘whisper down the alley’ among a group of Santa Fe friends. No one follows a specific recipe so we all have our favorite variations. But the one I’m posting is Geri’s favorite. (Another friend, Allyn, adds shredded carrots to hers.) I actually like it without the fruit and cheese, but honestly I eat it differently almost every time I make it. Here goes.

kale
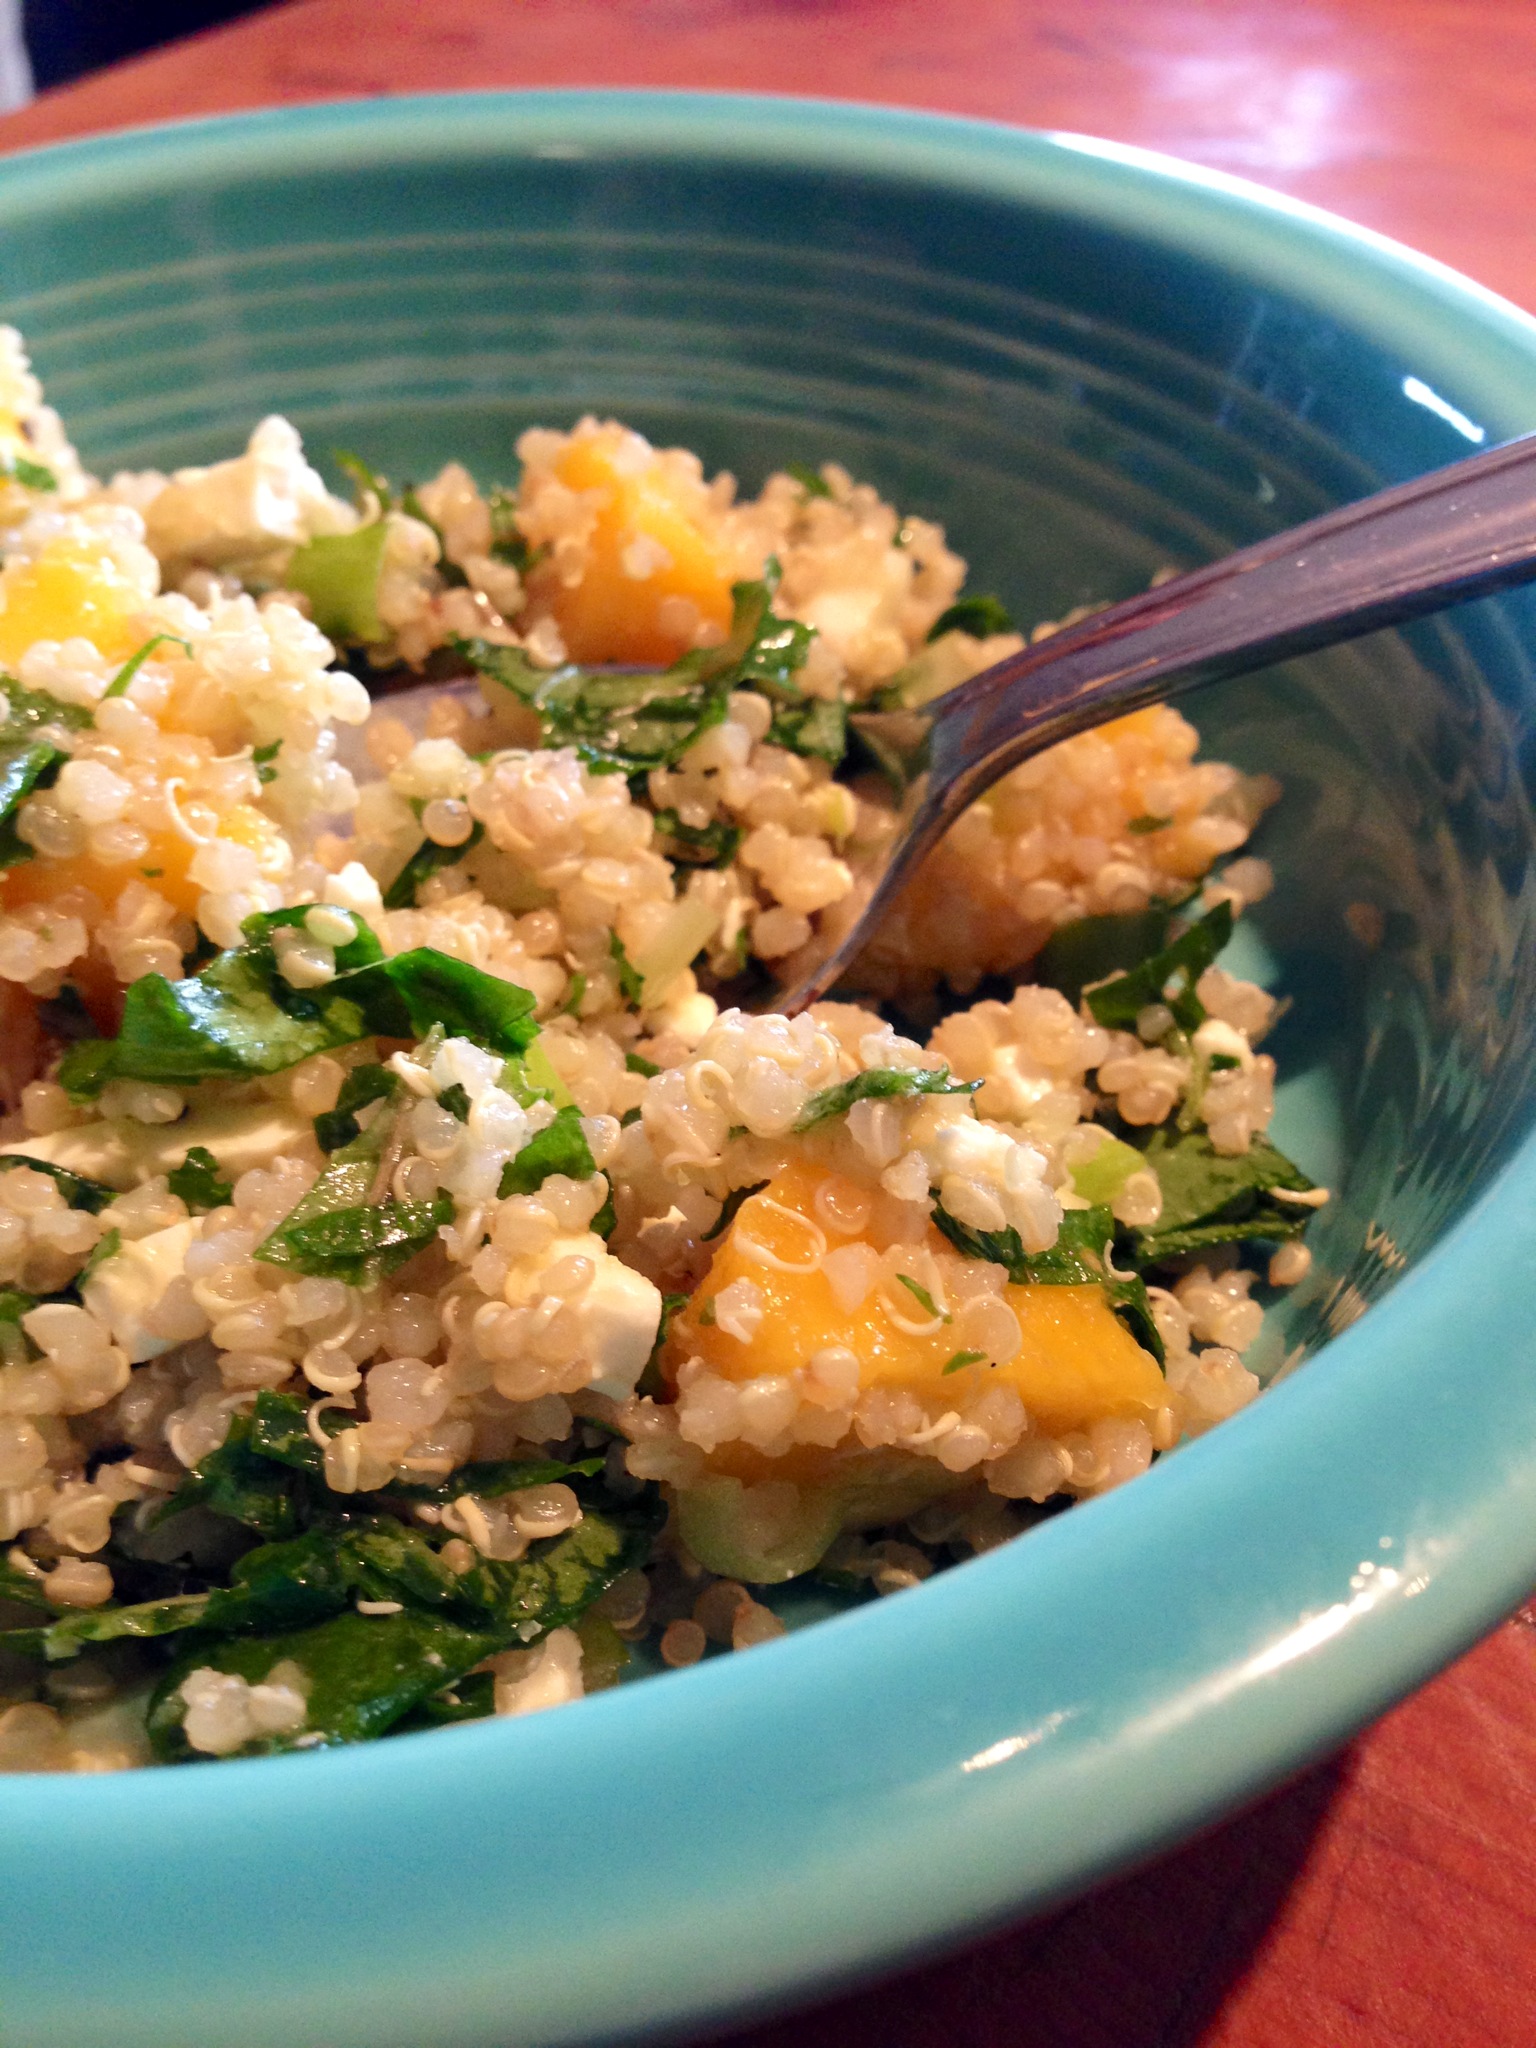
RECIPE: Kale and Quinoa Salad with Mango & Feta

  • 3 cups cooked quinoa (nice and fluffy)
  • 2 cups kale, shredded/chopped into small pieces
  • 1 mango, peeled and diced
  • handful of fresh, chopped herbs (mint, dill, chives, basil – whatever you have)
  • 4 scallions, chopped
  • 1/2 – 3/4 cup of crumbled feta (add as much as you like)

FOR VINAIGRETTE:

  • 1/4 cup cider vinegar
  • 1/2 cup olive oil
  • 1 TBSP agave nectar, honey, pure maple syrup
  • 1 clove garlic, chopped
  • salt and pepper to taste

DIRECTIONS:
mixed
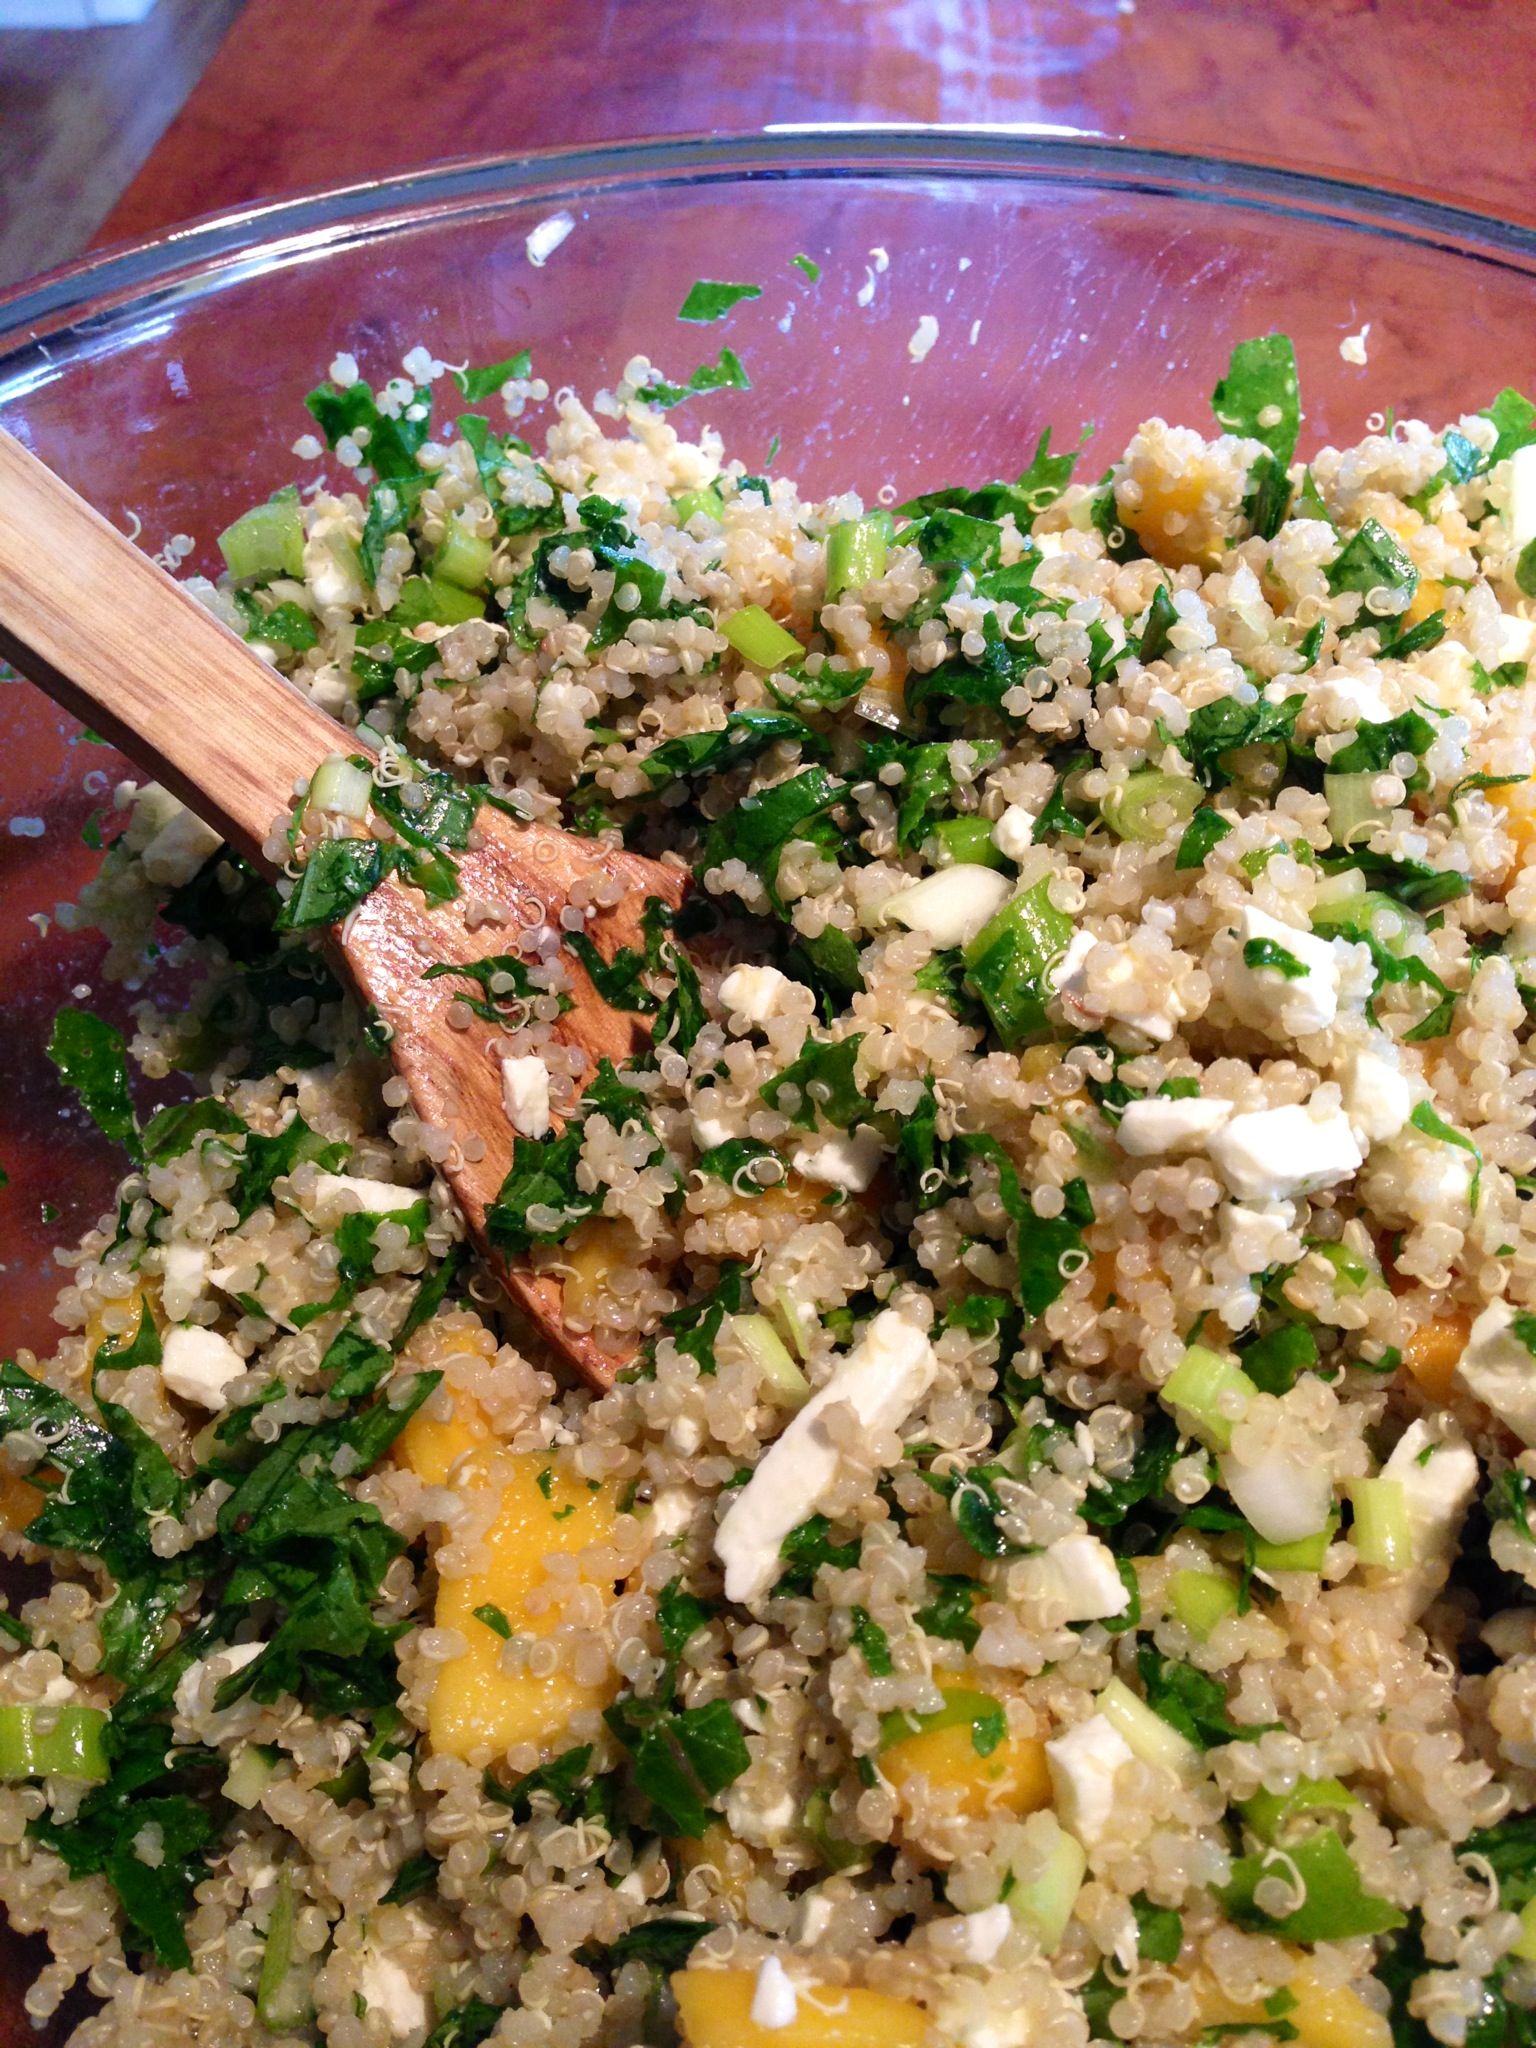
Add quinoa, kale, mango, fresh herbs, scallions and feta to a large mixing bowl. Shake all dressing ingredients in a jar with a lid. Drizzle the dressing into the salad a bit at a time until it’s to your liking. Add salt and fresh cracked pepper to taste.

NOTE: When I make this salad, I add a little feta each time I dish it out, rather than in the bowl. The feta taste seems to take over the freshness of the salad as it sits in the fridge. Don’t worry if you don’t eat it all in one sitting – this is even better the next day! And I hear it’s great with blueberries instead of mango. Enjoy!

serving

Cocoa Swirl Cheesecake Bars in the Raw

Detoxinista has be to one of my favorite food bloggers for healthy eating. I came across this recipe of hers last year when I was hunting for a new healthy dessert idea. Wow, this is a gem – especially since I’m a huge fan of hiding vegetables in dishes whenever I can. Not to mention this taught me a completely new concept and way of looking at zucchini. I don’t typically seek out eating ‘raw,’ other than the obvious salad, but I swear this dessert will change your mind, too.

I’ve made this probably a thousand times (yes, it’s that good) and because it’s stored in the freezer, that means you can cut it into little squares and have one or two whenever you’re craving something sweet. This version is slightly adapted because I added more of the veggie component so I could splurge a little more on the amount of swirl.  😉

NOTE: this recipe contains RAW (untoasted) nuts which can be purchased at any grocery store in the bulk nut or produce section on one of those little displays.

RECIPE: Chocolate Crust

  • 1 cup pecans
  • 2 Tablespoons cocoa powder
  • 2 Tablespoons pure maple syrup
  • 1 Tablespoon coconut oil
  • 1/2 teaspoon vanilla extract
  • 1/4 teaspoon sea salt

Directions:
In a mini-food processor, process the pecans until they are crumbly. Add in the rest of the crust ingredients, and process until thoroughly combined, scraping down the sides if necessary. Then transfer the crust to a square 6″ Tupperware, lined with plastic-wrap or parchment, and press down evenly. Place the crust in the freezer to set for at least 10 minutes, while you make the cheesecake filling.

RECIPE: Cheesecake filling

  • 1 cup RAW cashews, soaked for at least an hour (there are pale, unroasted cashews)
  • 1 cup zucchini, peeled to remove the green and chopped
  • 2 Tablespoons fresh lemon juice
  • 2 Tablespoons coconut oil
  • 1/4 cup honey or agave
  • 1 teaspoon vanilla extract
  • 1/4 teaspoon sea salt

Directions:
Throw all of the ingredients into a blender and blend until silky smooth – be patient, it will happen. Pour the filling over the chocolate crust and smooth the top, using a spatula:

RECIPE: Chocolate Swirl
NOTE: I double this because it’s my favorite part and makes the dessert taste so much richer, so the picture isn’t as chocolatey as my version turns out. This is why I modified the recipe to include more zucchini.

  • 2 Tablespoons cocoa powder
  • 1 Tablespoon pure maple syrup
  • 1 Tablespoon coconut oil, softened

Directions:
Whisk the ingredients together until smooth. Then drizzle over the cheesecake mixture. Take a knife and drag through the drizzle. Like I said, mine isn’t hugely marbled because the chocolate almost covers the entire top.

Once your cheesecake bars are “swirled” to your liking, place them in the freezer to set for at least 4 hours. When they are firm, pull out the frozen cheesecake ‘block’ using the wrap or parchment ‘handles’ and place on a cutting board. Cut into squares and serve chilled. Be sure to store these in the freezer– they will melt quickly at room temperature!

cheesecake_swirl

NOTE: If I’m serving this to guests, I usually trim off the edges (and eat them myself) so I can cut perfect squares.
**Recipe and images by Detoxinista.

Rosemary Grilled Lamb Chops with Sweet & Sour Mint Jus

Just when you can’t eat another piece of grilled chicken or hamburger on the barbie, lamb chops are a welcome change – plus they are so easy to make and really delicious. Perfect with a giant salad or some grilled veggies of your choice.

RECIPE: Rosemary Grilled Lamb Chops
• 2 lbs lamb chops
• 4 cloves garlic, chopped
• 3 TBSP fresh, chopped rosemary
• olive oil
• salt and pepper

DIRECTIONS:
Toss lamb in olive oil, garlic and rosemary. Salt and pepper each side. Grill over direct heat 3-4 minutes per side, flipping only once. This should be medium, depending on your grill. Tent with foil for 10 minutes to let the meat rest.

20130803-151454.jpg
RECIPE: Sweet & Sour Mint Jus

• 1/4 cup vinegar (white wine, cider, champagne, red wine)
• 1/4 cup raw sugar
• 1/4 cup water
• 1/3 cup chopped mint
• 1 tsp chopped hot red pepper, chopped
• 1 clove garlic, chopped
• 1/4 cup olive oil
• salt and pepper to taste

DIRECTIONS:
Muddle together sugar and mint in a bowl. Add remaining ingredients and then whisk in olive oil. Taste and adjust sweetness, saltiness and sour levels to your liking. Divide into small bowls so each plate has their own for dipping. Enjoy!

20130803-151656.jpg

Mini Zucchini Parmesan Tarts

I’ve been thinking about a new series on the blog dedicated to reviewing some of those funny, flash-in-the-pan, social media recipe crazes that show up repeatedly in Facebook news feeds everywhere. When I see something at least five times from unrelated people, I consider it a fad worth trying. I’ve given many of them a whirl – some are secret little gems; others are complete and total flops.

Just a little note about this category of recipes: they are jam-packed with modifications and might have a slightly different name. Long story short, all of these have been inspired by Facebook in one way or another. Here’s the first in the series.

____________________________________________________________________

Zucchini is extremely versatile and can be use a thousand different ways – because it really doesn’t taste like anything. It relies heavily on cooking technique, marinades, dips, and accompaniments to demonstrate its value. But it has a ton when you figure out what to do with it. I saw this idea blast the internet a few weeks ago and decided to give it a try. Plus, I really love cheese – especially parmesan because it has tons of flavor so you can eat less and feel just as satisfied. More bang for the buck, if you will. This recipe is great for a snack, a side dish or even for breakfast when you need a punch of veggies and some protein. Here goes…

RECIPE: Mini Zucchini Parmesan Tarts

  • grated_zucchini2 small or 1 large zucchini (grated; I use the food processor with the grating attachment), but you can do it with a box grater)
  • 3/4 cup freshly grated parmesan cheese (no green can!)
  • 1/4 freshly chopped chives (or scallions, parsley, dill, tarragon, basil – whatever fresh herb you have, but I prefer the mild onion flavor from chives)
  • good pinch of salt and cracked black pepper
  • 1 or 2 eggs, beaten (see note below)
  • 1/2 cup nonfat greek yogurt (to serve on the side)

filled_zucchini cupsDIRECTIONS:
Preheat oven to 375 degrees. Add all ingredients to mixing bowl and toss to combine with (clean) hands. Generously spray a mini-muffin tin with non-stick spray and fill each well with zucchini mixture, pressing it down with your fingers. Bake for approximately 35 minutes until edges and bottom are a deep crispy brown and ingredients are set. Serve warm or room temperature with a dollop of nonfat greek yogurt for extra protein – and because it’s delicious.

NOTE: if making these for breakfast, use 2 eggs. I think they set better with two, although I like the taste better with one because it’s more cheesy. But that’s just me. Experiment and decide for yourself.plated_zucchini Enjoy!

Chocolate Pudding in the Raw

I love super-healthy desserts that trick everyone into thinking they are falling off the food wagon. And the best part is admitting that it’s so good for them, it’s actually okay to have a (small) second helping.  This one has so few ingredients, that it’s hard to believe how good it is. Plus, it’s a simple, comfort food that reminds me of childhood.

avocadosSo, who doesn’t love chocolate pudding, right? Yum. But usually it’s made with egg yolks, milk, heavy cream, lots of sugar and it has to be cooked carefully over low heat to prevent scorching and starting all over again. Or you can make it out of the little square box, but that’s a big no-no in my book. Not this recipe. In fact it’s dairy-free, vegan, full of raw ingredients and no cooking necessary! Well, what is it made from? Avocados. But no one will ever know, unless you tell them ahead of time and they’ll swear they do. They’re lying.

avo_cocoa_foodprocessorRECIPE: Chocolate Pudding in the Raw

  • 2 completely ripe avocados
  • 6-8 TBSP dark cocoa powder (if you don’t have dark, regular will work fine)
  • 1/4 cup agave nectar (or pure maple syrup if you don’t have agave)
  • 2 tsp pure vanilla extract
  • 1 can coconut milk (use everything but the liquid on the very bottom; if using light, only use 1/2 can or it will be too watery)

coconutmilkDIRECTIONS: Scoop out avocado into a food processor. Add cocoa powder, agave & vanilla. Blend until smooth. You’ll have to scrape down the sides of the bowl a few times until it becomes the consistency of a super thick pudding and no green avocado flecks remain. Taste for sweetness and add more agave, if you like. I’m not a huge fan of super-sweet desserts, so the agave measurement might be a little less than some people prefer. Also, the ripeness of the avocados can affect the measurements. But taste, taste, taste as you go! That’s the only way to be sure.

In a separate bowl, add the coconut milk and 1 tsp vanilla. Beat with a mixer until smooth. Combine (by hand – not with your hands – using a spoon) the chocolate mixture with the coconut milk to lighten up the texture. Refrigerate for at least an hour. Serve in small bowls and garnish with a mint leaf, if you have it.

chocolate_puddingThis pudding is packed full of omega 3, healthy fats, anti-oxidants, and potassium! So enjoy!

Kale, Pineapple and Shaved Brussels Sprout Slaw

Have a sweet tooth? This is a great way to enjoy some sweetness accompanied by a mound of superfoods. And if you’ve never tried raw brussels sprouts, now’s your chance to turn your opinion of those dreadful mini boiled cabbages around. This slaw is crunchy, tangy, sweet and it’s filled with a ton of vitamins. Not to mention a satisfying pile of protein-packed cashews on top.

shaved_brusselsRECIPE: Kale, Pineapple and Shaved Brussels Sprout Slaw

  • 1 lb brussels sprouts (cut ends off, chop in half, lay cut-side-down and chop until shredded OR slice them in the food processor)
  • 4-5 large kale leaves (stem removed, cut finely into thin strips)
  • 1/2 ripe pineapple (cut into small chunks)
  • 2 TBSP vinegar (white wine or cider)
  • 1 TBSP dijon
  • 1/3 cup olive oil
  • 1 tsp agave nectar or pure maple syrup (if needed, depending on the ripeness and sweetness of the pineapple)
  • salt and pepper to taste
  • roasted, unsalted cashews

brussels_kale_pineappleDRESSING AND ASSEMBLY:
Add brussels sprouts, kale and pineapple to a large bowl. Then make the dressing; add these ingredients to a jar with a lid: vinegar, dijon, olive oil, agave nectar and salt and pepper to taste. Shake vigorously until thoroughly combined. Pour half of the dressing over the slaw and toss. Add more dressing until you get it coated to your liking. The amount usually depends on the sweetness of the pineapple. Let the flavors marry for at least 20 minutes. Top each serving with a palmful of chopped cashews. Add a couple extra turns of cracked black pepper. Enjoy!

kale_pineapple_brussel_slaw

Spanakopita and Quinoa Stuffed Portobello Mushrooms

I love spanakopita; simple as that. Sauteed spinach and soft warm feta is the perfect combination of flavors, but when you pack it between sheets and sheets of buttery phyllo, it’s not the healthiest way to consume all of those greens on a regular basis. Here’s a fresher, lighter way to enjoy those flavors in what can be a hearty side dish or great vegetarian meal.

Recipe: Quinoa and Spanakopita Stuffed Portobello Mushrooms

  • 4 large portobello mushroom caps
  • 1/2 pound fresh spinach (or a 1 1/2 bags)
  • medium onion, chopped
  • 4 scallions, diced
  • 3 TB fresh dill (or 1 tsp dried)
  • 1/2 cup feta (set aside 2 TB)
  • nutmeg
  • 2 cups chicken stock
  • 1 cup white quinoa
  • olive oil
  • balsamic vinegar
  • salt and pepper to taste
  • toasted pine nuts, rough chopped (optional)

Roast portobellos:
Preheat the oven to 375ºF. Gently wipe off the mushroom caps with a damp towel; carefully remove stem and scrape out the gills with a spoon. Place the caps on a baking sheet. Drizzle with a little olive oil, a couple splashes of balsamic vinegar, salt and pepper. Roast for 10-12 minutes, flipping half way through, just to soften before stuffing.

spinach_sautee Spanakopita filling:
Heat the olive oil in a large saute pan. Saute the onions and scallions until tender. Add the spinach and dill and cook until the spinach is wilted. Sprinkle (or grate) a little nutmeg and season with salt and pepper to taste. Cool, rough chop and stir in feta.

Prepare quinoa:
Cook quinoa per package directions, using chicken stock instead of water to add more flavor. It should be fairly fluffy when cooked, not heavy, dense and clumped together

Assemble and bake:
With mushroom caps gill side up on the sheet pan, spoon in 1/4 cup of quinoa into each one. Then top with a heaping spoon of spanakopita filling, even divided among the four caps. Sprinkle with the reserved feta, drizzle with a little olive oil and put back in the oven for 15 minutes until warmed all the way through. Put under broiler if your oven doesn’t brown the top to your liking during the baking process. Sprinkle with pine nuts for a little crunch. Drizzle with a little more balsamic if you wish. NOTE: Before assembling, taste the filling and the quinoa to make sure each layer is sufficiently seasoned for your taste; adjust as needed. Enjoy!spanakopita_mushroom

Crispy Coated Chicken Tenders from Scratch with Creamy Feta Buttermilk Dipping Sauce

NOTE: This recipe requires an overnight or at least a full-day buttermilk soak, so make sure to plan ahead.

– – – – – – – – – – – – – – – – – – – – – – – – – – – – – – – – – – – – – – – – – –

I get inquiries about this recipe more often than any other one, and it’s always from my friends with kids who are scrambling to make dinner before the household hits critical mass. It’s an easy, inexpensive and much healthier way to to have chicken tenders without buying frozen nuggets that display a paragraph of ingredients (only a few of which I recognize). You can serve them along side your favorite dipping sauce, or give the Feta Buttermilk dipping sauce a try.

Before I get started, let me say that there’s no great way to photograph a pile of raw chicken soaking in buttermilk, drenched in hot sauce. So please know the image is not intended to make your mouth water – rather to demonstrate how easy it is to throw everything in one bowl and be on your way.

Note: I’m experimenting with some other coatings (such as oats and nuts) that crisp up nicely without having to pan fry, but for the sake of posting this recipe sooner rather than later, I’m using Panko.

RECIPE: Crispy Coated Chicken Tenders

  • 1 lb chicken (breast cut up into thick strips or chicken tenderloins – which are more affordable and less work)
  • 1 clove garlic, finely chopped
  • buttermilk
  • hot sauce
  • salt and pepper
  • dried basil (or italian seasoning)
  • 1/2 box or bag of Panko breadcrumbs (I prefer whole wheat, but either works great)
  • 1/2 cup finely grated parmesan cheese (grated, not shredded – and NOT the stuff in the green can)

DIRECTIONS:
chickenbuttermilkSpray a sheet pan liberally with non-stick spray and drizzle a little olive oil over that. (I’m a fan of the organic spray when I have to use it, but whatever you have is okay.) Add chicken to a large bowl or container with a lid. Cover completely with buttermilk. Add as much hot sauce as you like, garlic, salt and pepper to the bowl. Toss and marinate all day (at least 8 hours) or overnight is best. (I like to do it the day before I bake them.) In a wide, shallow bowl or glass baking dish, add the panko, parmesan cheese, sprinkle of salt, pepper and just enough dried basil so you can see the flecks evenly distributed throughout (close to a teaspoon).

chickenpanTake the chicken (a few pieces at a time), drip off the excess buttermilk and place directly in the panko. Toss gently to coat completely and press the panko into the chicken so it sticks. Place chicken on the pan fairly close together, but not touching. When the pan is full of chicken tenders, drizzle liberally with olive oil. Bake at 500 degrees for 16-18 minutes, flipping halfway through.

RECIPE: Creamy Buttermilk Feta Dipping Sauce

  • 1/2 cup feta cheese (or blue cheese, if you prefer)
  • 3/4 cup buttermilk
  • 1/4 cup mayo
  • 1 scallion, roughly chopped
  • 1 clove of garlic, roughly chopped
  • salt and pepper to taste

DIRECTIONS:
Add all ingredients to the blender and whiz on high until smooth. Add a little more buttermilk to get to the consistency you prefer for dipping, and adjust seasonings according to taste. Enjoy!

chickensauceNote: Everyone’s ovens vary, so it might take a time or two to get this recipe just right. Adjust the amount of nonstick spray and olive oil drizzle to get the result you want. I prefer mine a little light and dry, but others like a little more glisten. To each his own.

PS: Because the chicken is being cooked at such a high temperature, the stray breadcrumbs may get dark on the bottom of the pan and smoke a bit. I use my fan, just in case. But don’t worry. You shouldn’t be burning anything.

Perfect Protein Parfait

For those of you who know a little french, please forgive me for the redundancy of the title. I couldn’t think of a better way to describe assembling your own yogurt treat rather than buying those pre-sweetened, fruit-on-the-bottom, boring single-serve cups. I know they are convenient and I certainly grab them on occasion, but if you have the time – and definitely on a leisurely weekend morning – give this a try. It’s also a perfect afternoon snack if you need a little boost of energy from the protein (over 30 grams to be exact!)

proteinparfait1The base of this recipe is plain greek yogurt  – make sure it’s the thick, greek variety, otherwise you’re missing out on the maximum amount of protein. I suppose you could use vanilla, but I’m a purist when it comes to this parfait. It’s also a super versatile dish, so make it yours or give everyone in your family the option to build their own by changing up the fruit. It’s kind of like picking out their flavor of yogurt off the shelf – only better.

  proteinparfait2RECIPE: Protein Parfait

  • 1 cup plain greek yogurt
  • 1 cup fruit (or fruits) of choice; in bite-size pieces
  • pure maple syrup (or raw honey)
  • granola (homemade, all natural, or gluten-free)
  • sliced almonds

ASSEMBLY:
Layer half of the yogurt, a drizzle of maple syrup, half the fruit, a liberal sprinkle of granola and almonds. Repeat. Or you can throw it all in a bowl together if you’re eating it at your desk, which is how mine is most often consumed. Today, I had an extremely ripe peach and some local blueberries, so it was extra delicious. Enjoy!

proteinparfait3

Crunchy Roasted Chickpeas

Everyone is always looking for something to snack on, including me. Preferably something that has a serving size of more than eight bites. Popcorn (when you cook it yourself in a cast iron skillet with olive oil) is a good option, but how many times can you eat that in a row? For me, not that many. So I thought about hummus, but then I always use a snack to dip in the hummus, which kind of defeats the purpose.

But I’m stuck on the idea of chick peas. They have tons of fiber, protein, antioxidants, can help lower cholesterol and regulate blood sugar – plus I love their versatility. (Sorry paleo friends; I’m a legume fanatic.) When roasted in the oven, chick peas turn into perfect little crispy bites and can handle whatever spice or flavor you’re in the mood for.

chickpeasdryingRECIPE: Crunchy Roasted Chickpeas

  • 1 can garbanzo beans
  • olive oil
  • whatever dried spices you like (I used curry, tumeric and paprika)
  • salt and pepper to taste

DIRECTIONS:
Drain garbanzo beans and spread out on a paper towel; pat completely dry and transfer to a sheet pan. Remove the skins that have escaped their bean or they can look like remnants of cicadas molting, if you don’t. Drizzle with olive oil; just enough to coat (approximately 1 TBSP). Sprinkle chickpeasinpanliberally with your favorite spices; and lightly salt and pepper. You can taste the intensity of the spices and saltiness at this stage, although the texture will completely changed when baked. Bake at 400 degrees for 25 minutes. Keep a close eye toward the end because as soon as they start to brown, it goes quickly. You can taste along the way and cook for a few minutes more or less, depending your oven. NOTE: Some people prefer dry-roasting the beans and then tossing them in the olive oil and spices at the end. This is also delicious, but they make your fingers a little messier this way, which isn’t the best option if you’re snacking while working.

chickpeasroastedFLAVOR COMBINATIONS:
I used curry, tumeric and paprika in this post because I was in the mood for Indian flavors. But so many flavor combinations work really well, depending on your mood. Onion, garlic and oregano. Smoked paprika. Red chile and garlic. Or toss in some fresh chopped rosemary with garlic and black pepper. You name it – anything goes. But just because this is a savory snack for me, you can change it up easily and create a sweet snack. Try a little honey, cinnamon and nutmeg. Or maple syrup and ginger. This post is about a method, not a recipe – make it your own and enjoy!