Teriyaki Chicken with Stir Fried Garlic Ginger Green Beans

Every Sunday, I marathon cook. And mostly that means making a pile of lunch that reheats well and is large enough to feed my giant man for five days. He and all of his strongman buddies eat, eat, eat and then they eat some more. Especially right before a show, they’re packing in the protein and intentionally OD’ing on (pretty healthy) calories as often as they can. This recipe is simple, well-balanced and even takes a little help from some store-bought Japanese teriyaki. I’ve included a homemade teriyaki recipe at the bottom of the page, but since I’m writing this recipe mostly for the strongmen, I’m taking some shortcuts that will make things easier. All-in-all, this recipe is more prep and assembly than a complicated cooking endeavor, but delicious nonetheless. It’s also a perfect meal for families during a busy weeknight (but 1/2 of the recipe would be plenty for a family of 4 average-sized human beings).

teriyakisauceRECIPE: Teriyaki Chicken

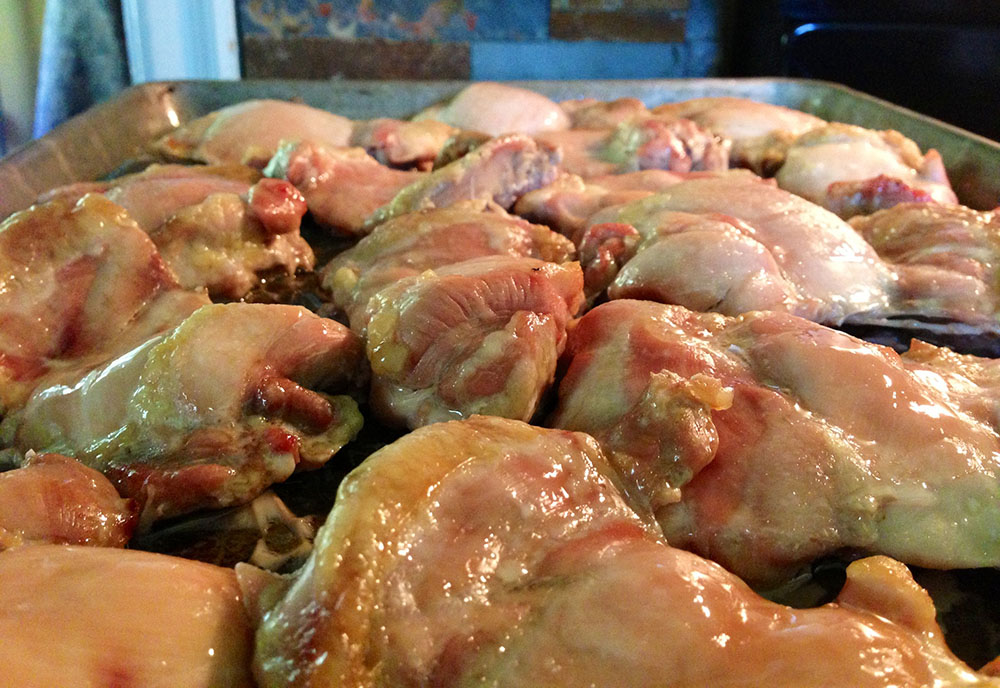
  • 15 chicken thighs (boneless/skinless)
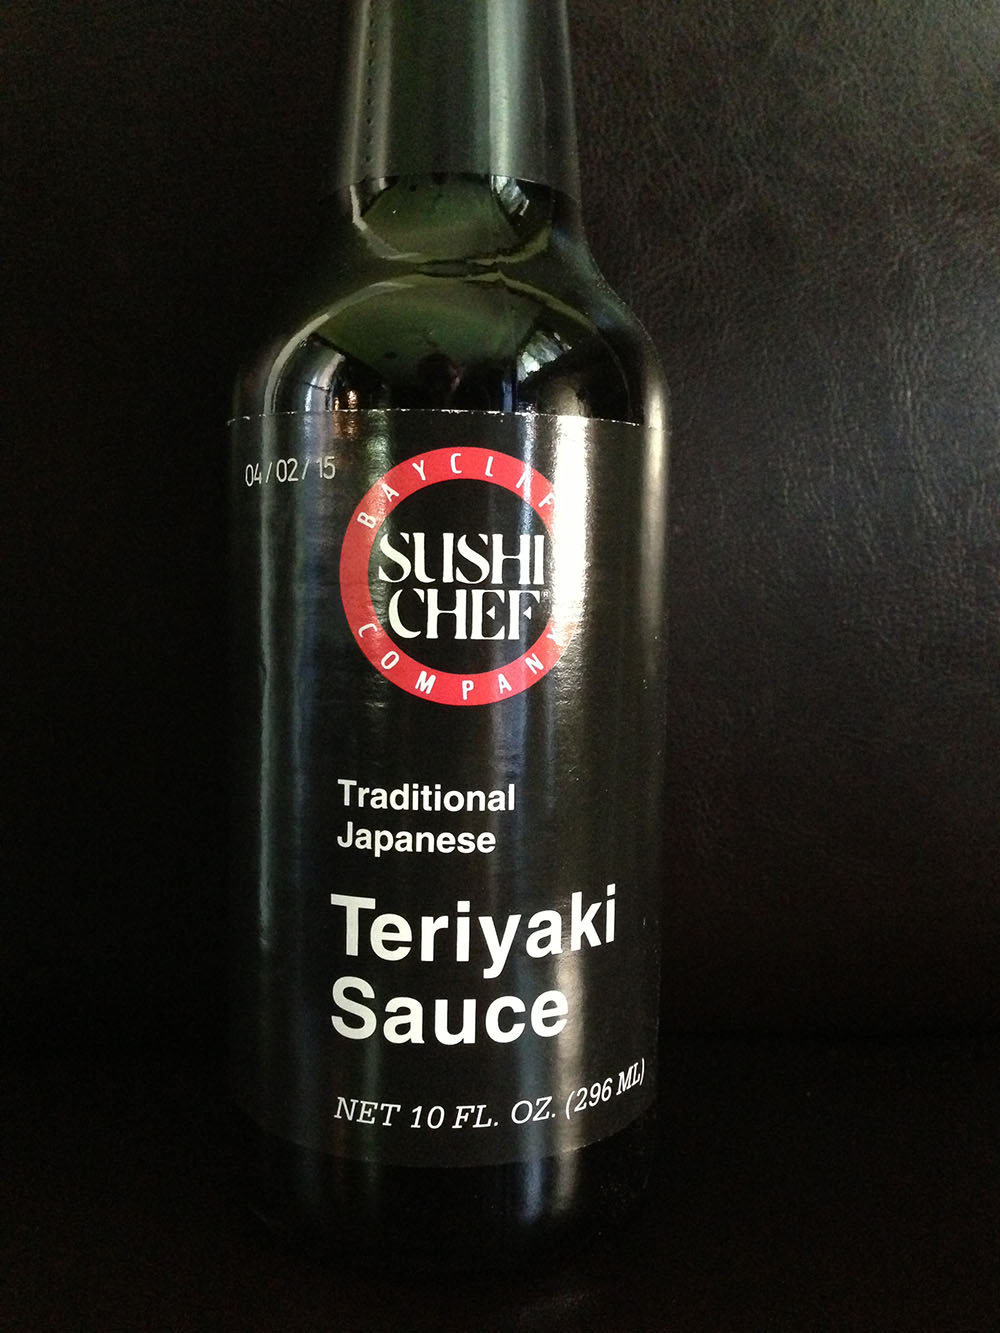
  • 1/2 – 1 cup teriyaki sauce (Sushi Chef brand, in the black bottle)

roastedchixthighsDIRECTIONS:
Preheat oven to 450 degrees. Lay out chicken thighs on a sheet pan leaving a little space between them so they don’t just steam. Roast in the oven for 20-25 minutes until the chicken is cooked through. Remove pan from oven and let the chicken rest for 15 minutes before slicing into strips. Toss with 1/2 cup of teriyaki sauce. Taste and add more, if desired.

soygingergarlic
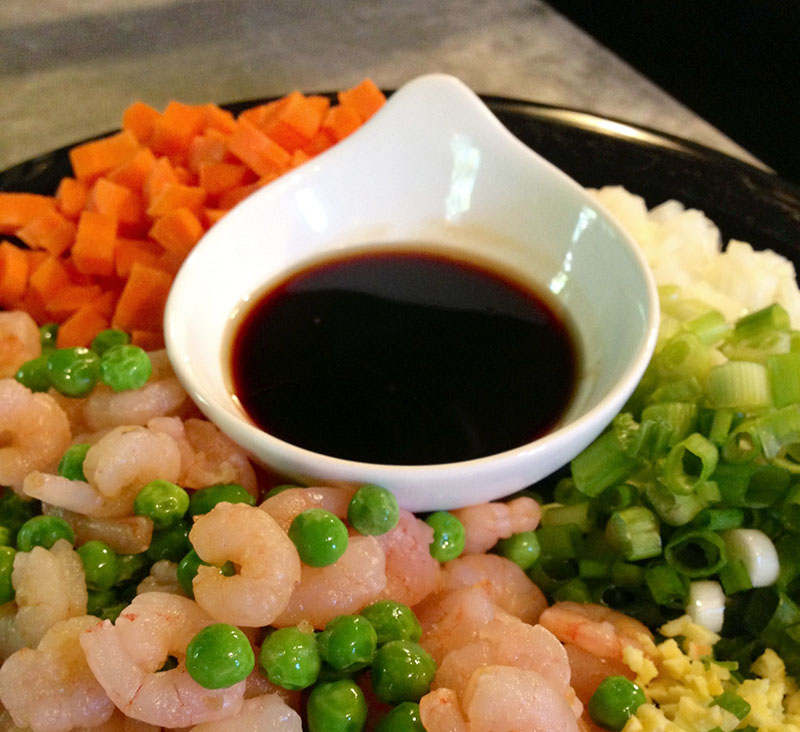
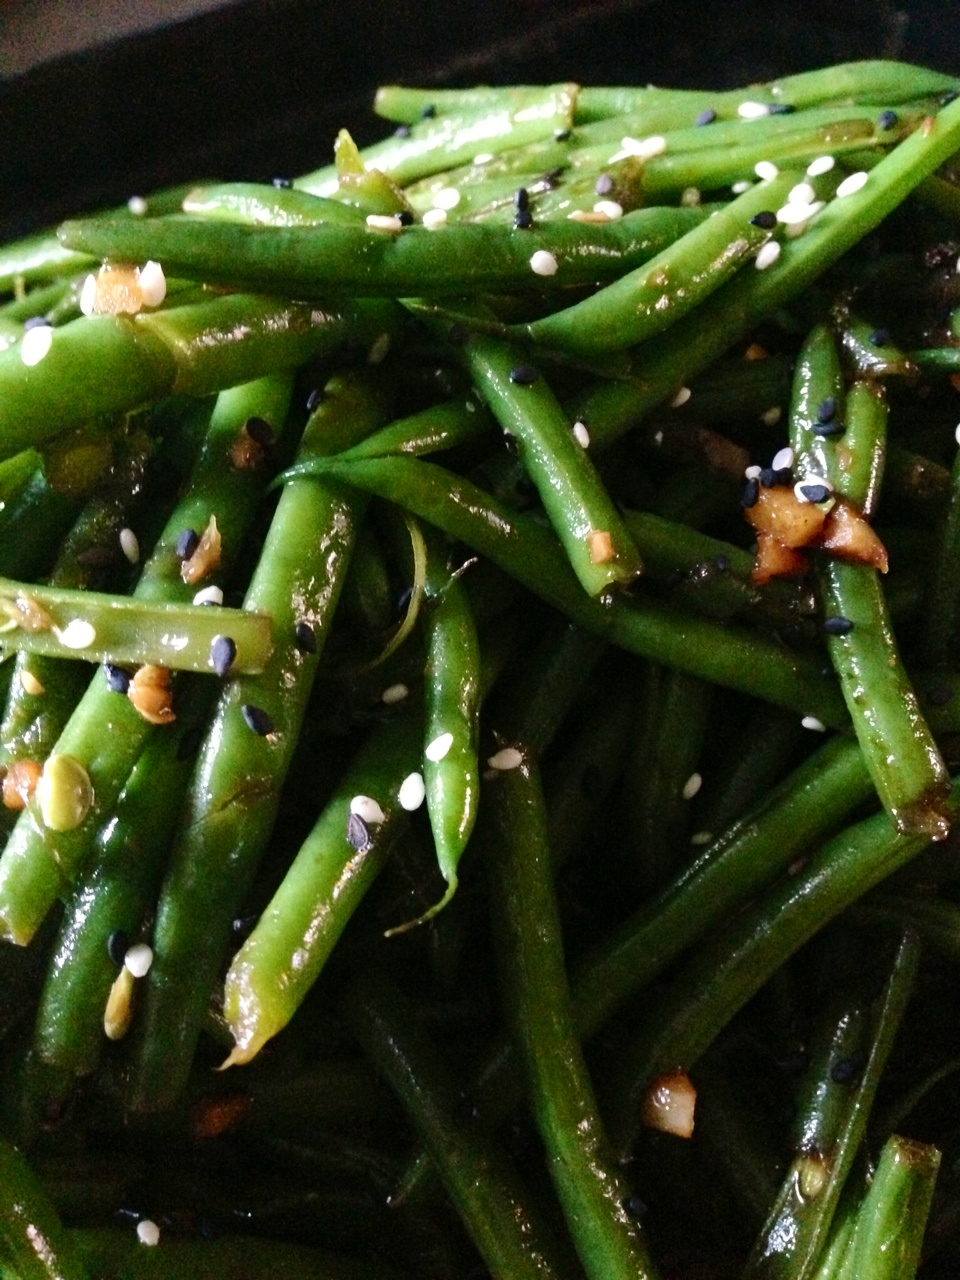
RECIPE: Stir Fried Garlic Ginger Green Beans

  • 2 lbs fresh french green beans (the thin ones that usually come washed and trimmed in a plastic bag in the produce section)
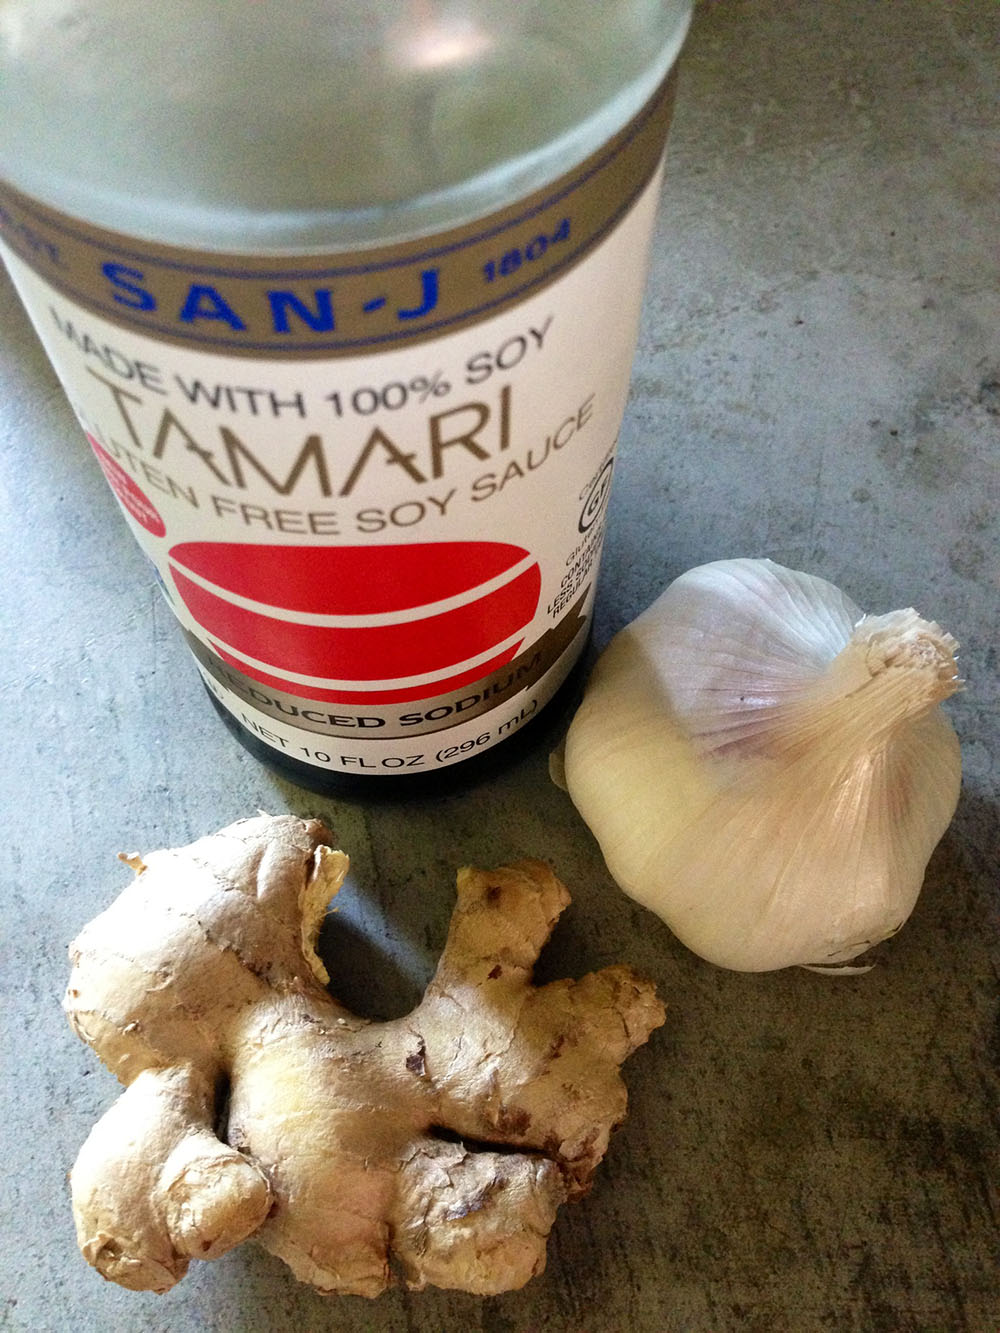
  • 3 TBSP fresh ginger root, minced
  • 4 TBSP olive oil
  • 4 cloves garlic, chopped
  • 2-3 TBSP low sodium soy sauce

DIRECTIONS:
blanchedgreenbeansgreenbeans
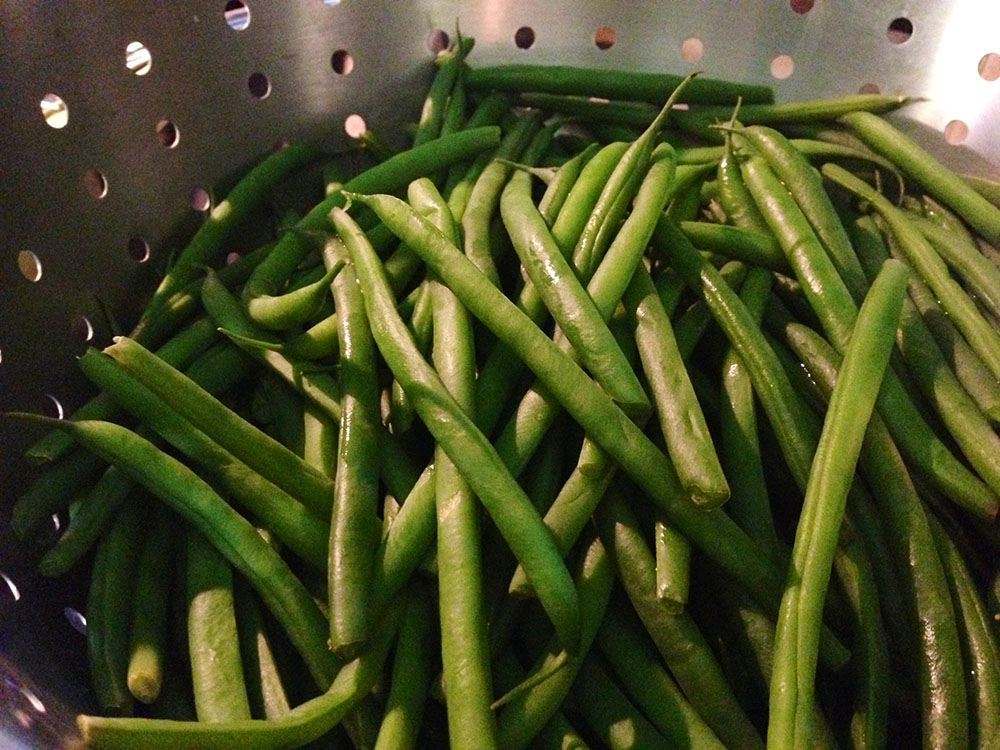
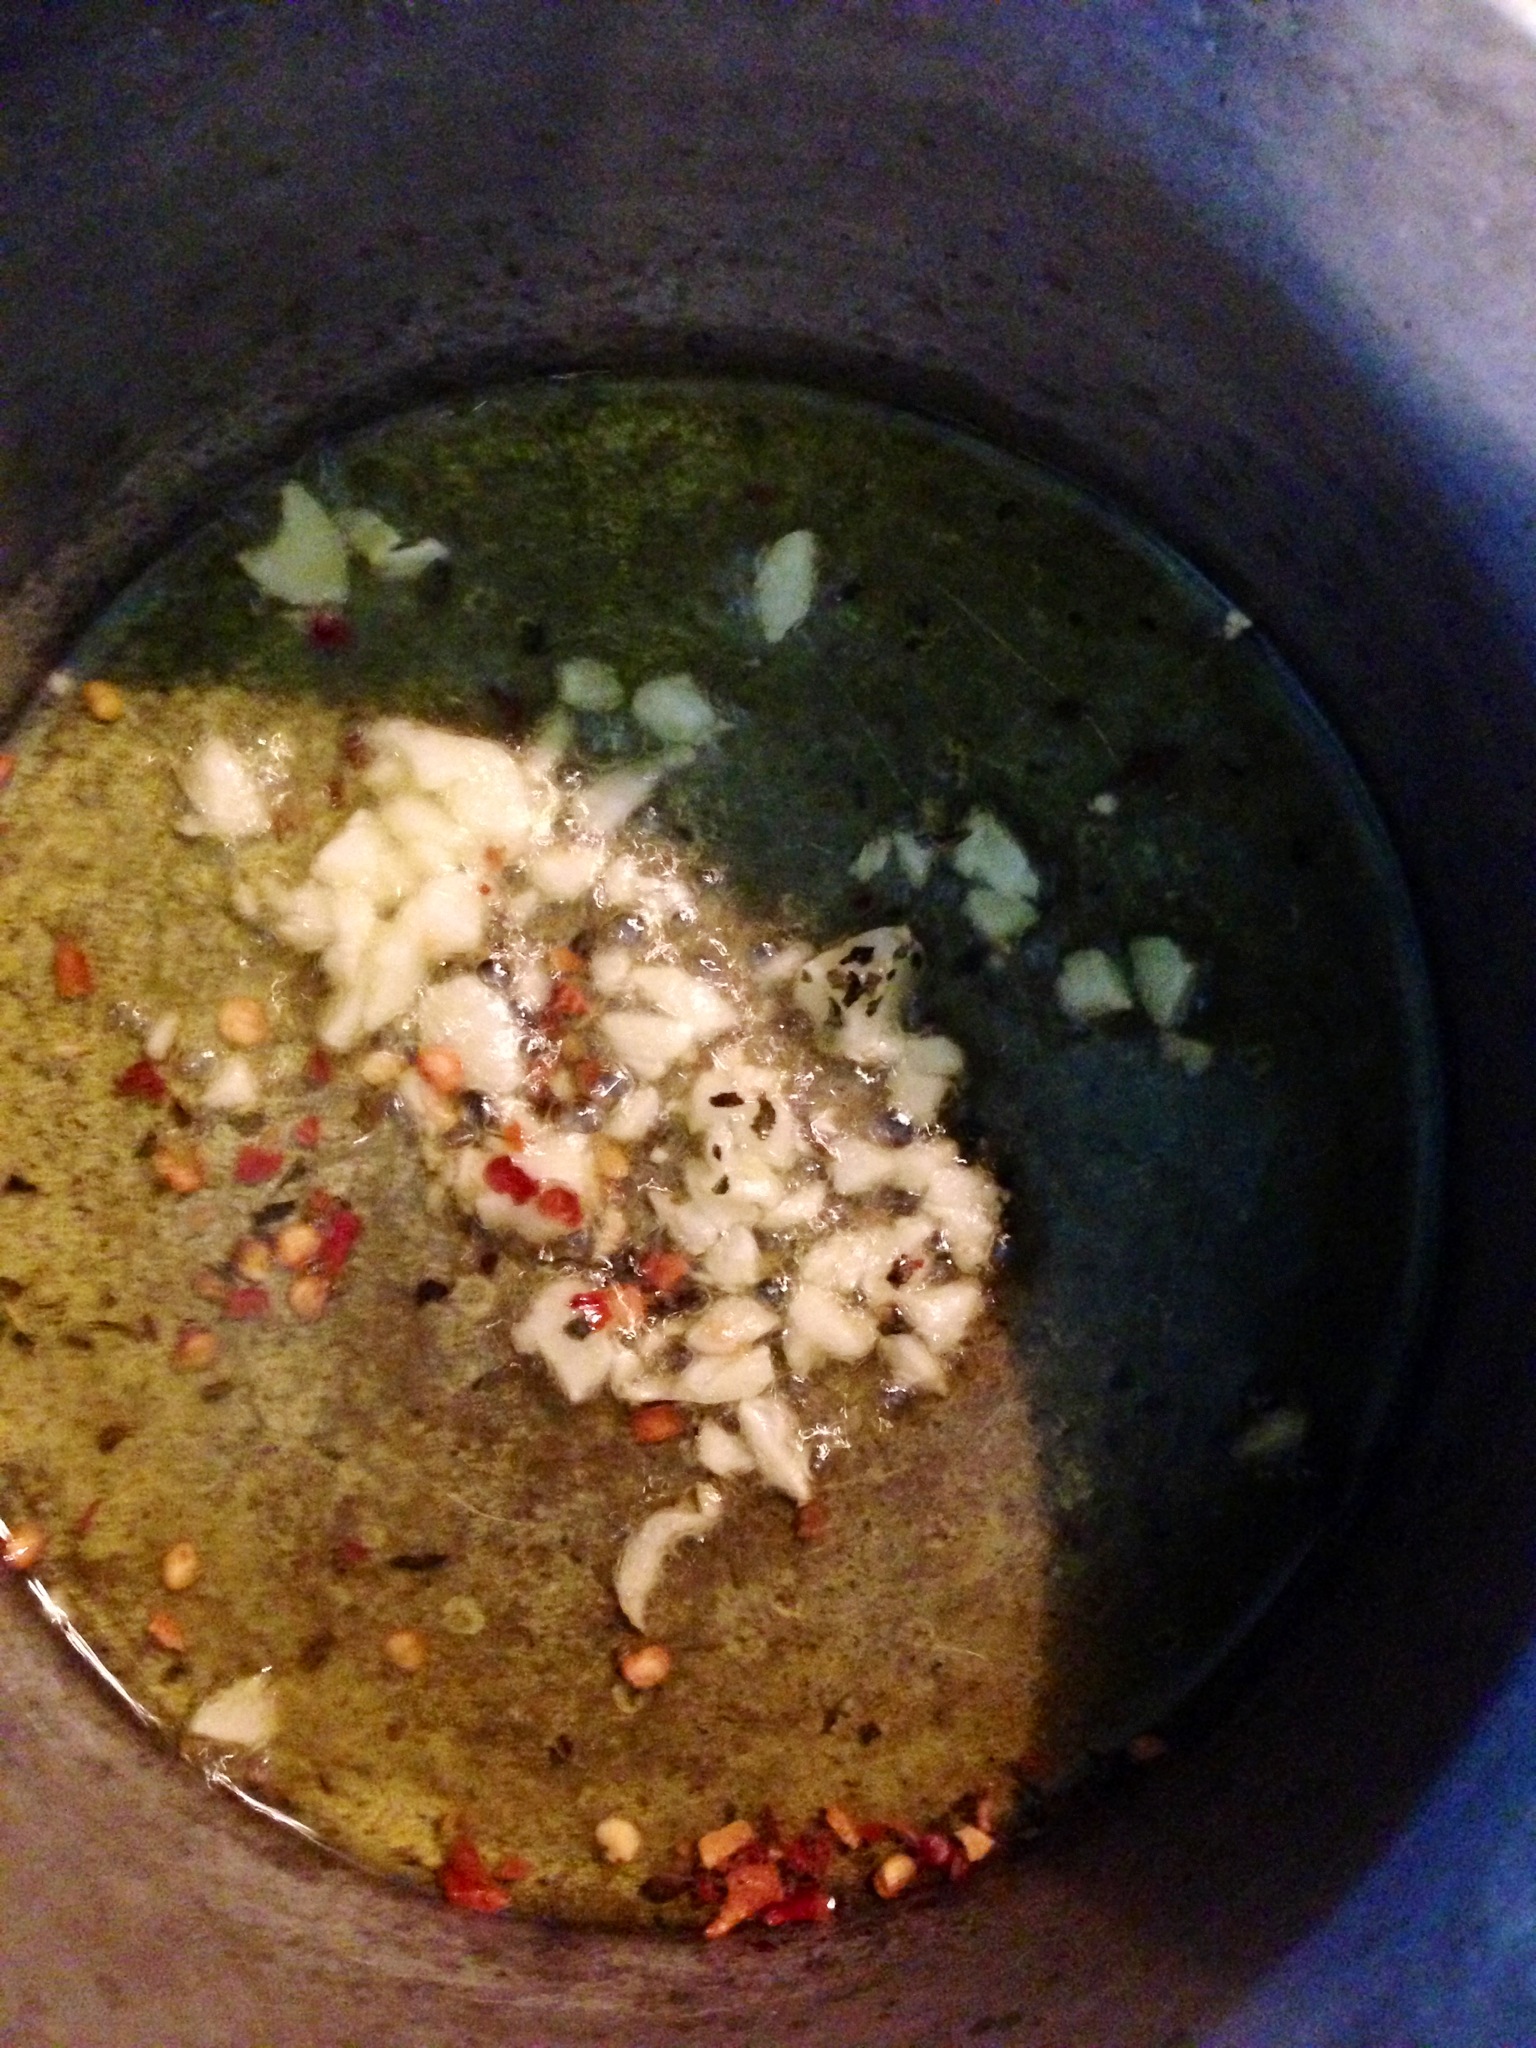
Bring a pot of salted water to a boil and blanch green beans for 3-4 minutes. Drain into colander while you heat up olive oil over medium-high heat. (You should shock the green beans in ice water, but I don’t bother since I’m stir frying right away). Saute ginger and garlic for about 30 seconds.

Add green beans and toss quickly to coat, and to keep the garlic and ginger from burning. After about two minutes, the green beans will start to blister slightly. Hit the pan with soy sauce until it caramelizes. Taste the green beans and add a little more soy, if desired.

teriyakichixthighplate
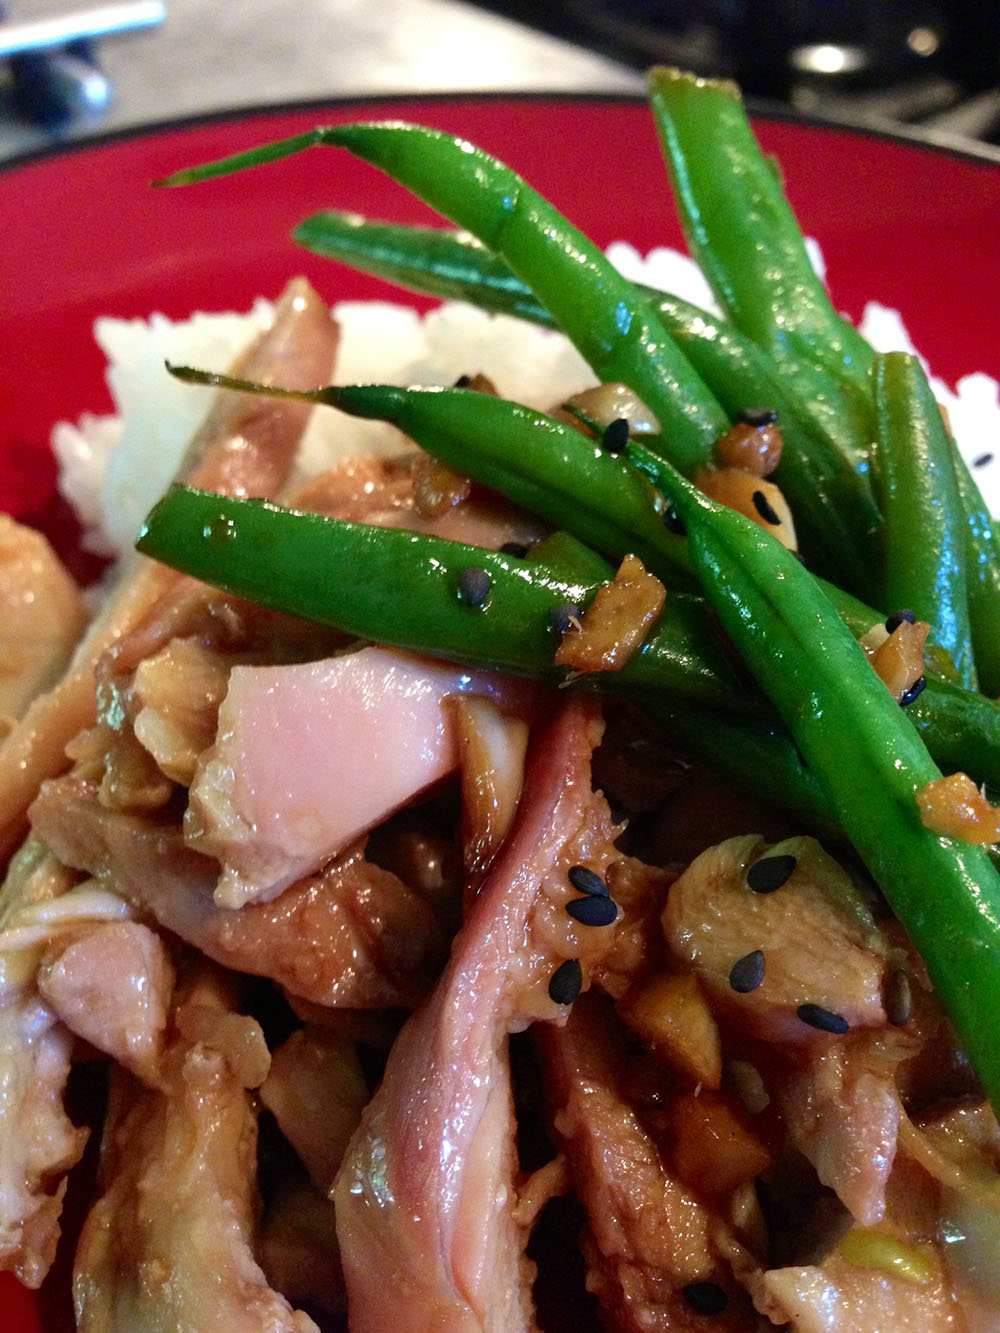
Serve chicken and green beans with a side of steamed jasmine rice and top with sesame seeds for garnish. Enjoy!

RECIPE: Homemade Teriyaki Sauce

  • 2/3 cup mirin
  • 1 cup soy sauce
  • 4 tsp rice vinegar
  • 1 teaspoon sesame oil
  • 1/3 cup honey or agave nectar
  • 5 cloves garlic, chopped
  • 1 tablespoon minced fresh ginger

DIRECTIONS:
Bring mirin to a boil in a saucepan over high heat. Reduce heat to medium-low, and simmer for 10 minutes. Pour in soy sauce, rice vinegar, sesame oil, and honey/agave. Add garlic and ginger; simmer 5 more minutes.

Oatmeal Buttermilk Pancakes with Homemade Peach Syrup

I came up with this recipe one day because I was really tired of the same bowl of oatmeal for breakfast. So instead of pouring the oats into a measuring cup while I was waiting for the water to boil, I threw them into the blender with a couple other things and made a batter. Traditional pancakes have no nutritional value whatsoever – a slurry of cooked white flour slathered in butter and pancake syrup. But this recipe has no flour whatsoever; instead it uses oats for fiber, nuts for protein, hearth-healthy flax seeds topped with homemade peach syrup and a dollup of nonfat greek yogurt for even more protein. Super healthy and really satisfying if you’re craving pancakes but feel guilty veering away from your oatmeal regimen.

blenderRECIPE: Oatmeal Buttermilk Blueberry Pancakes with Homemade Peach Syrup

  • 1 cup regular oats
  • ½ cup raw almonds
  • ½ cup buttermilk
  • ½ unsweetened almond milk
  • 1 egg
  • ½ tsp baking powder
  • ¼ tsp baking soda
  • ½ tsp vanilla extract
  • Dash of cinnamon
  • 1 TBSP flax seeds
  • ¾ cup blueberries (optional)

Put everything in a blender and blend until fairly smooth, like the consistency of pancake batter. Let sit for 15-20 minutes and add another splash or two of almond milk to adjust the consistency. (Because you’re working with raw oats, they will absorb the liquid the first time around and the batter will get thick after sitting for 15 minutes; that’s why you have to adjust the consistency again.) Cook in greased skillet as you would a regular pancake. If you wish, sprinkle with blueberries before flipping. Makes 3 hearty 6-inch pancakes.

syrupTO MAKE THE SYRUP:
The peach syrup pays homage to my Aunt Ginny and her mother, Alice Hendrick. When she was a little girl, her mother gathered all the peach peelings and seeds which were left over from another peach project (such as pies or canning sliced peaches) and put them into a saucepan with a 2-to-1 ratio of sugar to water – just enough to barely cover the peach trimmings.  After simmering for about 2 hours, watching and testing throughout, the syrup is finished when most beautiful color appears, and the taste and consistency follow.

NOTES: Like most homemade syrups, it will be thinner than actual maple. But if you want, you can continue to cook until it gets closer to a candy stage. Instead of white sugar, I recommend using organic raw sugar or maple sugar. I also added a small pinch of salt and a tiny squeeze of lemon juice as I do to any jam or chutney I make.

The peach syrup pairs perfectly with these pancakes, but pure maple syrup and a dab of butter do just fine if that’s what you have. Either way, enjoy!

pancakes

Perfect(ly healthy) Chocolate Sauce

I don’t really like to bake, but I really love dessert. And by dessert, I mean chocolate. If there was a way to eat a huge piece of chocolate cake everyday and stay healthy, I’d do it in a heartbeat. So until someone figures that out, I’ve created something to tide us over. It’s simple, healthy, made from clean, whole ingredients. And you don’t have to feel the slightest bit guilty about eating it.

Chocolate sauce is the answer. It’s the perfect way to have your cake and eat it, too. Especially if you’re like me and don’t want to make a whole dessert during the week that you feel obligated to finish just so it won’t go to waste. We are a family of two here at my house, and I work from home. So you do the math on who might consume most of those calories.

Now, back to chocolate sauce. This is the key to making every dessert just a little better. Put it on ice cream, cheesecake, or brownies. Use it as a dip for strawberries, cookies, pound cake, or churros. Even drizzle it over a grilled banana and garnish it with a handful of your favorite nuts. I mean, the possibilities are endless. So tonight by adding a spoonful of chocolate sauce and a sprinkling of sliced almonds, I turned this teeny little dairy free ice cream sandwich* into a decadent dessert to die for.

icecreamsandwich-dessert

RECIPE: Perfect(ly healthy) Chocolate Sauce

  • 2 TBSP coconut oil
  • 2 TBSP raw honey
  • 1/4 cup dark cocoa powder
  • 2 TBSP nonfat greek yogurt
  • 2-3 TBSP almond milk

Combine the coconut oil and raw honey in a small bowl. Microwave for 20 seconds until it’s melted together. Stir in the cocoa powder until smooth. Once combined, stir in the greek yogurt. Slowly add almond milk to thin out the mixture to the perfect consistency. Because you’re using cocoa powder instead of melting chocolate solids, adding liquid will not cause the sauce to seize up. It’s very easy and completely forgiving. Adjust the amount of cocoa and sweetness to your liking. This recipe makes approximately one cup of sauce. Enjoy!

sandwich-box* The SO DELICIOUS brand of ice cream sandwiches make the perfect size small dessert. They can be found in the natural food freezer section of your grocery store.

Shrimp Fried Quinoa

Whenever I make quinoa for a recipe, it never ceases to amaze me how it makes five times as much as I plan for every single time, so there is usually a big container in the fridge for the next day or two. There isn’t always a plan for the leftovers, but the other day I was craving fried rice. So I had (plenty of) quinoa, happened to have all the traditional veggies in the fridge, and even found some little salad shrimp in the freezer. (I wish I had fresh shrimp in the fridge instead, but it just wasn’t in the stars that day). Nonetheless, here’s what I whipped up.

NOTE: This can be made into a vegetarian meal by substituting diced, baked tofu instead of the shrimp. ANOTHER NOTE: I recommend cooking the quinoa in stock instead of water to give it more flavor.

RECIPE: Shrimp Fried Quinoa

  • shrimp_ingredients3-4 cups leftover quinoa, chilled
  • 1 small onion, diced
  • 4 carrots, diced
  • 8 green onions, chopped (reserve 2 TBSP)
  • 1 garlic cloves, chopped
  • 1 tsp fresh ginger, peeled and minced
  • 1 cup frozen peas, thawed
  • ½ lb cooked salad shrimp or cooked large shrimp diced
  • 3 eggs, beaten
  • 3 TBSP teriyaki sauce
  • 4 TBSP soy sauce
  • 2 tsp sesame oil
  • 3 TBSP safflower or light olive oil for stir frying
DIRECTIONS:
shrimpfriedquinoaBegin by making the sauce. Mix together the soy, teriyaki and sesame oil and set aside. Then start stir-frying the ingredients in layers. Using a wok or large saute pan, heat the oil and cook the carrot and onion for a few minutes before adding the green onions, ginger and garlic to the pan. Stir for a couple minutes more. Make sure the pan is super hot, then add another drizzle of oil to stir fry the quinoa. Next add the shrimp (or tofu), peas, sauce mixture and stir over high heat until it’s evenly distributed. Then scrape everything to the edges of the pan so there is room to scramble the eggs in the middle. Once the egg is cooked, mix throughout the rest of the fried quinoa. Top with remaining scallions for garnish and serve. Makes 3-4 servings, depending how hungry you are. Enjoy!

Nut Butter Chocolate Chip Cookie Dough Bites

chickpeas_processorSeemingly one of the most widely spread Facebook recipes I’ve seen, these cookie bites are pretty good when you’re craving melty, homemade chocolatey chip cookies. They are wheat free, gluten free, dairy free and pack a nice punch of protein and fiber. In my opinion, they’re only good when they’re warm, so I recommend making the batter and keeping it in an airtight container in the fridge, only baking the amount you want to eat each time. Plus, it’s a good way to not over indulge.

RECIPE: Nut Butter Chocolate Chip Cookie Dough Bites

  • batter1 can chic peas (drained, rinsed and patted dry)
  • 2/3 cup almond butter (or any kind of natural nut butter you have on hand)
  • 1/4 cup maple syrup, honey or agave nectar
  • 2 teaspoons vanilla extract
  • 1 teaspoon baking powder
  • Pinch of sea salt, optional
  • 1/2 cup dark chocolate chips
Directions:
Preheat oven to scoop350F. Line a baking sheet with parchment paper or use a silpat. Combine all ingredients except chocolate chips in a food processor. Blend until completely smooth, stopping to scrape down the sides as needed. Stir in chocolate chips. Using a small cookie scoop or a teaspoon, drop cookie dough on baking sheet. You don’t need to leave a lot of room between the cookies as they don’t spread out or rise up much at all. Bake for 10 minutes. Remove from oven and let sit for about 5 minutes before eating.
baked

Creamy Cheese Tortellini with Spinach, Tomatoes, and Pesto

My boyfriend, Matt, is a large human being. As a 6’5″, 300-pounder who trains strongman events with what is known as the ‘meat crew,’ my extensive list of kale salads doesn’t cut the mustard in feeding that guy. I’m committed to make sure he eats as healthy as possible, but considering his 4,000-calorie and 300 grams of protein a day diet, feeding him can be exhausting, to say the least. Unfortunately I loathe the crockpot, which would probably be the easiest way to deal with this scenario. Give me a dutch oven and I can braise anything to almost perfection. But as a cooking vessel, the crock pot makes no sense to me and I promise to ruin everything I put in there, without fail – except this. Thank you Facebook for another fad recipe that turned out to be a winner that can satisfy a strongman.

NOTE: This recipe has been altered from the original to add protein and more flavors, but can easily be served as a vegetarian meal.

spinach_tortellini_crockpotRECIPE: Creamy Cheese Tortellini with Spinach, Tomatoes, Sausage & Pesto

  • 1 bag of frozen cheese tortellini
  • 1 bag of fresh spinach
  • 2 cans of organic diced tomatoes, drained
  • 1 block of cream cheese, cubed (Greek style for extra protein, if you can find it)
  • 1/2 cup prepared pesto (I usually have leftover pesto in my fridge, or you make it fresh or buy it)
  • OPTIONAL 1 lb. of sausage, cooked (ground or cut links, pork, turkey, chicken, italian, plain or seasoned – your choice)
  • box (or 4 cups) organic vegetable or chicken stock

cheese_tortelliniDIRECTIONS:
Put all ingredients in crock pot and cook on low for 4-6 hrs. Check tortellini after 3 hours to see if it’s finished, and keep your eye on the consistency of the sauce. Add a little more stock if it gets too thick before the tortellini is done cooking. Enjoy!

*Images by Little Fellow and Tawna Allred

Kale Salad with Tahini Goddess Dressing and Spicy Garlic Croutons

I learn a lot from my gluten free friends. Including realizing certain products contain wheat. Goddess dressing is one of those products – and while I really don’t like bottled salad dressings at all, I will grab a bottle of Annie’s Goddess Dressing in a pinch. Not any more. This dressing is so similar made with just a few ingredients you can throw right in the blender. I apologize for another kale salad, but this superfood tossed with a homemade tahini dressing and crispy croutons with a kick is just too good not to share. I also recommend doubling the dressing recipe and keeping it in the fridge.

VARIATION: After making this a few times, I started adding 1 large carrot (peeled and rough chopped) to the blender. This increases the health value exponentially, while lowering the fat and improving the thickness. This variation is like goddess dressing meets ginger carrot dressing from your favorite Japanese place. I’ll never make it without carrot again.

dessing_drizzleRECIPE: Kale Salad with Tahini Goddess Dressing

  • a bunch of kale, washed, stem removed, leaves chopped into bite size pieces
  • 1/2 cup tahini (sesame paste)
  • 1/2 cup olive oil
  • 1/2 cup water
  • 1/4 cup tamari
  • 2 TBSP red wine vinegar
  • 2 TBSP lemon juice
  • 2 TBSP fresh ginger root
  • 2 cloves garlic
  • 1 large carrot (peeled and rough chopped) ** see VARIATION above
  • freshly cracked black pepper to taste

DIRECTIONS: Prepare kale; set aside. Mix all remaining ingredients in the blender and blend until smooth. Adjust seasonings to your liking. (I added another tablespoon of olive oil, water for consistency and an extra splash of tamari for a little more saltiness, but to each his own.)

garlic_oilRECIPE: Spicy Garlic Croutons

  • 4 slices of bread cut up into cubes  (I like Udi’s gluten free whole grain millet, but anything will do)
  • 2 cloves garlic, chopped
  • 1/4 tsp red chile flakes
  • 6-8 TBSP extra virgin olive oil
  • salt and pepper to taste


DIRECTIONS:

In a small saucepan, heat up olive oil with chopped garlic and red chile flakes. Remove from heat just before garlic starts to brown. Preheat oven to 375 degrees. Arrange bread cubes close together on a sheet pan and drizzle with hot garlic oil, a little salt and pepper. Toss to coat evenly (be careful, the oil is hot!). Taste to make sure the seasonings are right and then spread out croutons on the sheet. Bake for approximately 12 minutes, tossing once. Keep your eye on them so they don’t get too brown.

kale_tahiniASSEMBLY: In a large salad bowl, toss kale with the amount of dressing and croutons you like. This keeps pretty well in the fridge, but you might want to reserve the croutons just before serving, in that case. Enjoy!


kale_tahini

Smoky Tomato Salsa

Salsa is just about the best condiment on the planet – way better than ketchup. It’s fresh, healthy, versatile and can be made a thousand ways. I’ve found the best, most consistent result comes from a combination of sweet, fresh grape tomatoes and organic diced tomatoes. When tomatoes are in season, you can use more fresh. But having the combo allows you to make this all year long. This recipe is my favorite, and I can eat it by the gallon. So, if I were you, I’d double this to have more for later!

RECIPE: Smoky Tomato Salsa

  • 2 containers fresh grape tomatoes
  • 2 cans organic diced tomatoes
  • 1 poblano pepper
  • 1 chipotle pepper (smoked jalapenos canned in adobo sauce)
  • 1-2 jalapenos, deseeded (depending on how spicy you like it)
  • 4 scallions
  • 1/4 medium red onion
  • 1 garlic cloves
  • 1 small lime (use 1/2 to start)
  • handful of fresh cilantro (start small; add more as needed)
  • 1/2 – 1 tsp ground cumin
  • 1/4 – 1/2 cup tomato paste
  • salt to taste

DIRECTIONS:
red_salsaAdd both kinds of tomatoes to a large food processor. Rough chop the ingredients and add to tomatoes. Pulse until ingredients are they are well blended. You’ll notice that the tomatoes begin to release their water in this fresh, uncooked salsa recipe, so now add the tomato paste – it helps thicken some of that liquid and add a richness to the salsa. If you wish, strain (without squeezing) the excess water before serving. (This is just what happens with really fresh salsa.) Taste and adjust levels of cumin, salt, lime and chipotle pepper. You can add more of any of the ingredients until it’s as spicy and flavorful as you want it. Enjoy!

yellow_salsa
VARIATION
: You can do the same thing with all fresh yellow tomatoes, leaving out the chipotle peppers and diced tomatoes to retain the bright yellow color. Also, use a sweet yellow onion for this variation.

Kale and Quinoa Salad with Mango & Feta

ingredientsMy friend, Geri, brought me the fixins’ for this salad a few months back because she had picked some fresh kale out of her garden that morning. It blew my mind. It’s one of those dishes that each ingredient is independently delicious, but together it’s even better than the sum of its parts. I’ll do my best to be precise, but from what I understand this recipe has evolved like a game of ‘whisper down the alley’ among a group of Santa Fe friends. No one follows a specific recipe so we all have our favorite variations. But the one I’m posting is Geri’s favorite. (Another friend, Allyn, adds shredded carrots to hers.) I actually like it without the fruit and cheese, but honestly I eat it differently almost every time I make it. Here goes.

kaleRECIPE: Kale and Quinoa Salad with Mango & Feta

  • 3 cups cooked quinoa (nice and fluffy)
  • 2 cups kale, shredded/chopped into small pieces
  • 1 mango, peeled and diced
  • handful of fresh, chopped herbs (mint, dill, chives, basil – whatever you have)
  • 4 scallions, chopped
  • 1/2 – 3/4 cup of crumbled feta (add as much as you like)

FOR VINAIGRETTE:

  • 1/4 cup cider vinegar
  • 1/2 cup olive oil
  • 1 TBSP agave nectar, honey, pure maple syrup
  • 1 clove garlic, chopped
  • salt and pepper to taste

DIRECTIONS:
mixedAdd quinoa, kale, mango, fresh herbs, scallions and feta to a large mixing bowl. Shake all dressing ingredients in a jar with a lid. Drizzle the dressing into the salad a bit at a time until it’s to your liking. Add salt and fresh cracked pepper to taste.

NOTE: When I make this salad, I add a little feta each time I dish it out, rather than in the bowl. The feta taste seems to take over the freshness of the salad as it sits in the fridge. Don’t worry if you don’t eat it all in one sitting – this is even better the next day! And I hear it’s great with blueberries instead of mango. Enjoy!

serving

Cocoa Swirl Cheesecake Bars in the Raw

Detoxinista has be to one of my favorite food bloggers for healthy eating. I came across this recipe of hers last year when I was hunting for a new healthy dessert idea. Wow, this is a gem – especially since I’m a huge fan of hiding vegetables in dishes whenever I can. Not to mention this taught me a completely new concept and way of looking at zucchini. I don’t typically seek out eating ‘raw,’ other than the obvious salad, but I swear this dessert will change your mind, too.

I’ve made this probably a thousand times (yes, it’s that good) and because it’s stored in the freezer, that means you can cut it into little squares and have one or two whenever you’re craving something sweet. This version is slightly adapted because I added more of the veggie component so I could splurge a little more on the amount of swirl.  😉

NOTE: this recipe contains RAW (untoasted) nuts which can be purchased at any grocery store in the bulk nut or produce section on one of those little displays.

RECIPE: Chocolate Crust

  • 1 cup pecans
  • 2 Tablespoons cocoa powder
  • 2 Tablespoons pure maple syrup
  • 1 Tablespoon coconut oil
  • 1/2 teaspoon vanilla extract
  • 1/4 teaspoon sea salt

Directions:
In a mini-food processor, process the pecans until they are crumbly. Add in the rest of the crust ingredients, and process until thoroughly combined, scraping down the sides if necessary. Then transfer the crust to a square 6″ Tupperware, lined with plastic-wrap or parchment, and press down evenly. Place the crust in the freezer to set for at least 10 minutes, while you make the cheesecake filling.

RECIPE: Cheesecake filling

  • 1 cup RAW cashews, soaked for at least an hour (there are pale, unroasted cashews)
  • 1 cup zucchini, peeled to remove the green and chopped
  • 2 Tablespoons fresh lemon juice
  • 2 Tablespoons coconut oil
  • 1/4 cup honey or agave
  • 1 teaspoon vanilla extract
  • 1/4 teaspoon sea salt

Directions:
Throw all of the ingredients into a blender and blend until silky smooth – be patient, it will happen. Pour the filling over the chocolate crust and smooth the top, using a spatula:

RECIPE: Chocolate Swirl
NOTE: I double this because it’s my favorite part and makes the dessert taste so much richer, so the picture isn’t as chocolatey as my version turns out. This is why I modified the recipe to include more zucchini.

  • 2 Tablespoons cocoa powder
  • 1 Tablespoon pure maple syrup
  • 1 Tablespoon coconut oil, softened

Directions:
Whisk the ingredients together until smooth. Then drizzle over the cheesecake mixture. Take a knife and drag through the drizzle. Like I said, mine isn’t hugely marbled because the chocolate almost covers the entire top.

Once your cheesecake bars are “swirled” to your liking, place them in the freezer to set for at least 4 hours. When they are firm, pull out the frozen cheesecake ‘block’ using the wrap or parchment ‘handles’ and place on a cutting board. Cut into squares and serve chilled. Be sure to store these in the freezer– they will melt quickly at room temperature!

cheesecake_swirl

NOTE: If I’m serving this to guests, I usually trim off the edges (and eat them myself) so I can cut perfect squares.
**Recipe and images by Detoxinista.